YOUR OFFLINE GUIDE
Sleepy turtle
11 pieces · 7 steps
Four rounded feet and a curved brown shell make a small turtle with a sleepy-looking head. Eleven pieces are enough for a gentle garden story.

Before you build
Match the shapes
Compare each part with its picture and count its rows of studs. A square brick has two rows of two studs; a long brick has two rows of four. Use the full parts list for the exact shapes and quantities.
Follow the colours
Match the shapes and quantities. The pictures show our colours. Colour names in the steps refer to the pictures. Keep contrasting colours where they help you recognise the model.
Count the studs
The bumps on top are called studs. Count them when a step asks for a gap or an overhang. Put the build on a flat surface and keep its front facing the same way as in the pictures.
Add a little at a time
New pieces keep their colour in each step. Earlier pieces look lighter so you can see what has changed. Each list tells you exactly what to add.
Build together
An adult can read the steps while a child finds the pieces. The counts are for this one model. For two models to stay built, add their parts lists together.
Gather pieces
Match the shapes and quantities. The pictures show our colours. Choose your own colours for the same parts; changing a part’s shape is a different substitution.
A wheeled base counts as one complete part, including its attached wheels.
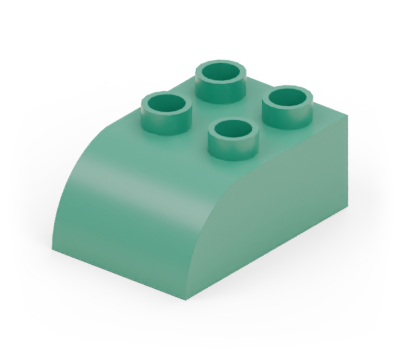 5 × Curved brick (2 × 3 studs)
Green
Part 2302b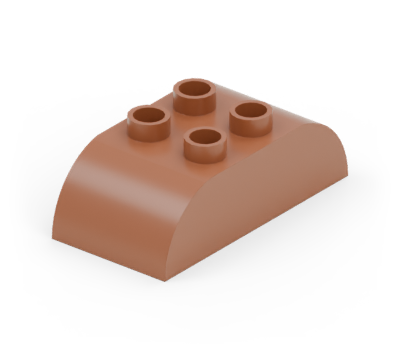 2 × Double curved brick (2 × 4 studs)
Brown
Part 98223b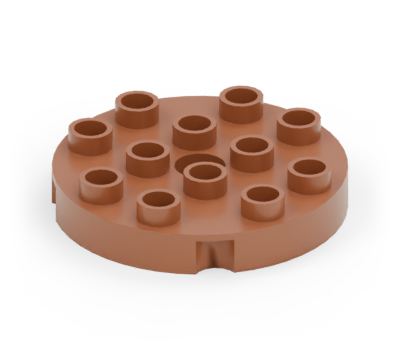 1 × Round plate (4 × 4 studs)
Brown
Part 98222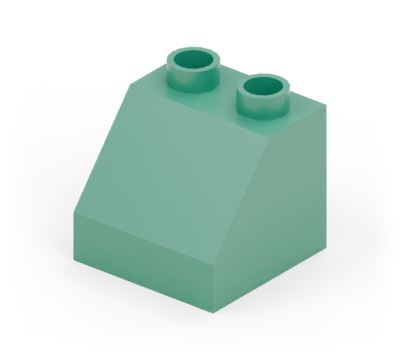 1 × Roof slope (2 × 2 studs)
Green
Part 6474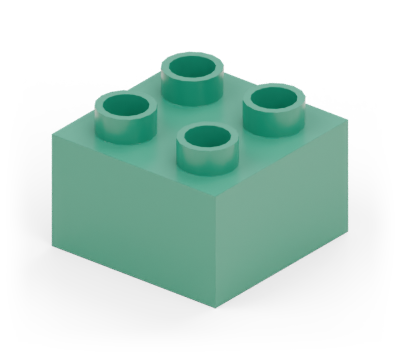 1 × Square brick (2 × 2 studs)
Green
Part 3437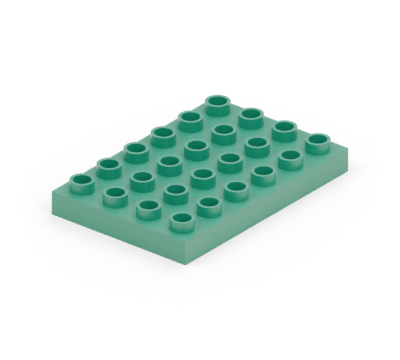 1 × Wide plate (4 × 6 studs)
Green
Part 25549
Shape-only checklist
- 5 × Curved brick (2 × 3 studs)
- 2 × Double curved brick (2 × 4 studs)
- 1 × Round plate (4 × 4 studs)
- 1 × Roof slope (2 × 2 studs)
- 1 × Square brick (2 × 2 studs)
- 1 × Wide plate (4 × 6 studs)
Total: 11 pieces
Build
STEP 1 OF 7
Set out four green curved feet in two pairs. Leave two stud columns between left and right feet, and one clear row between the back and front pairs. Point all rounded toes forward.

Add these pieces
- 4 × Curved brick (2 × 3 studs) (Green)
Earlier pieces are lighter in the picture.
STEP 2 OF 7
Join the feet with the green wide plate. Centre its four-stud width between the feet; its six-stud length covers the flat rows of all four feet.

Add these pieces
- 1 × Wide plate (4 × 6 studs) (Green)
Earlier pieces are lighter in the picture.
STEP 3 OF 7
Centre the brown round plate on the body, leaving one green row clear at the back and front.

Add these pieces
- 1 × Round plate (4 × 4 studs) (Brown)
Earlier pieces are lighter in the picture.
STEP 4 OF 7
Cover the shell with two brown double-curved bricks turned across the turtle, one behind the other.

Add these pieces
- 2 × Double curved brick (2 × 4 studs) (Brown)
Earlier pieces are lighter in the picture.
STEP 5 OF 7
Add the green square at the front for the neck. Its back row rests on the exposed green body row; its front row projects forward.

Add these pieces
- 1 × Square brick (2 × 2 studs) (Green)
Earlier pieces are lighter in the picture.
STEP 6 OF 7
Add a green curve to the neck, with the rounded end projecting forward as the sleepy head.

Add these pieces
- 1 × Curved brick (2 × 3 studs) (Green)
Earlier pieces are lighter in the picture.
STEP 7 OF 7
Finish with the small green slope at the back. Its high row attaches to the body and its low end points backward as the tail.

Add these pieces
- 1 × Roof slope (2 × 2 studs) (Green)
Earlier pieces are lighter in the picture.
READY TO PLAY
Your little story
Give the turtle a name.
Draw a leafy path on paper.
Describe a very slow adventure with one surprising stop.
Sources and credits
Original assembly. Part geometry adapted from the LDraw Parts Library; attribution and source notices retained. Colours are illustrative.
Revision: ac7087d05a845b93cdf2262c4c34dc703a166f071997f2806b8176e7b30a8edc
Source notices and software licences · Model and inventory record · Render record