LET’S BUILD TOGETHER
Classic rocket
11 pieces 7 steps · One little step at a time.
See all the pieces
A LITTLE PREPARATION
Gather your pieces
Use whichever colours you have. Check the shapes before you start.
11pieces in total
See the original colours
Your checklist stays on this device when browser storage is available.
01
STEP 1 OF 7
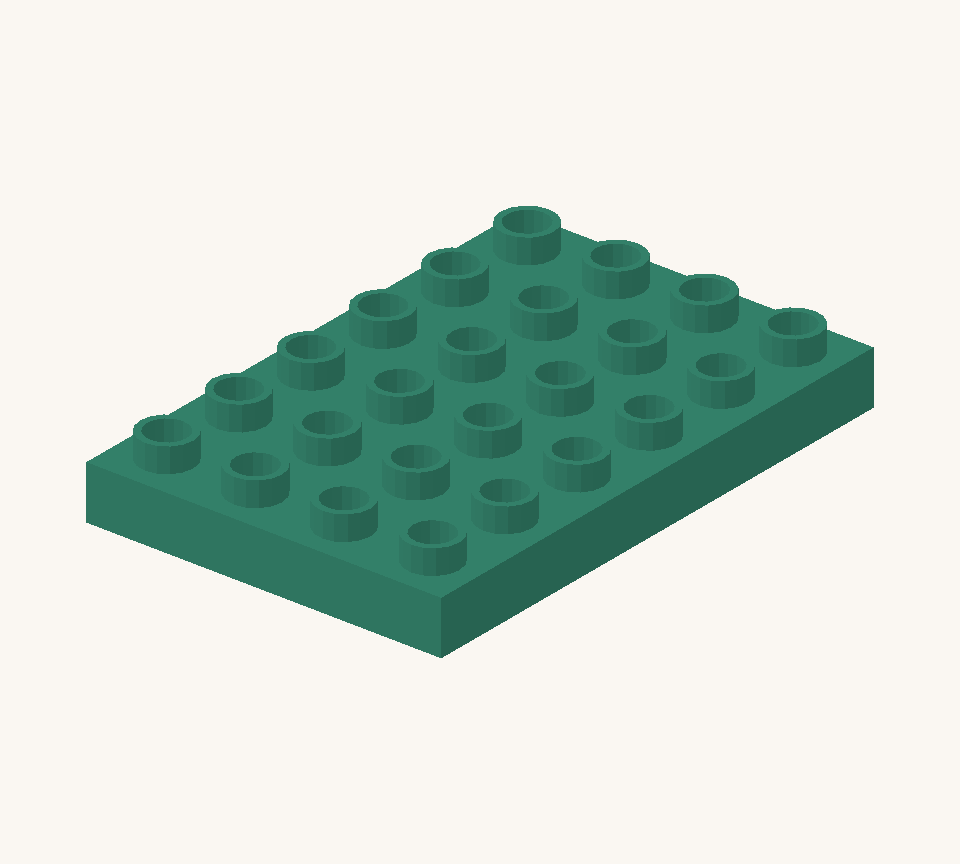
Set the green wide plate on the table with its six-stud length running away from you.
02
STEP 2 OF 7
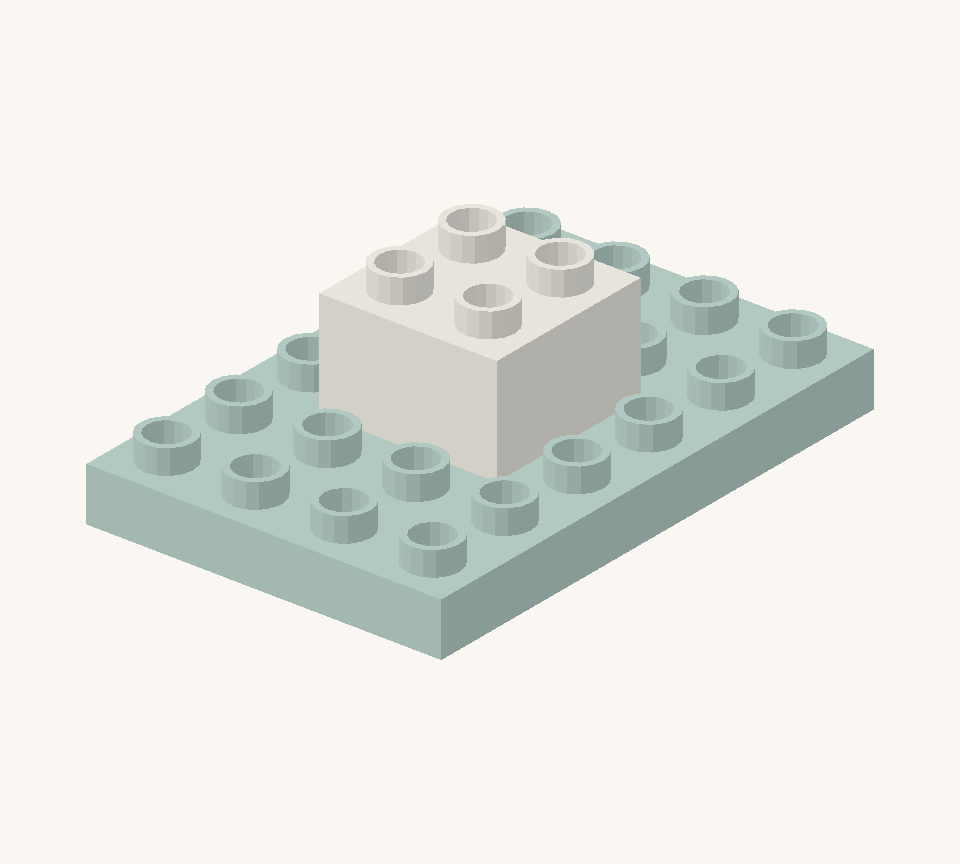
Centre a white square brick on the launch pad. Leave one stud column on each side and two rows at each end.
03
STEP 3 OF 7
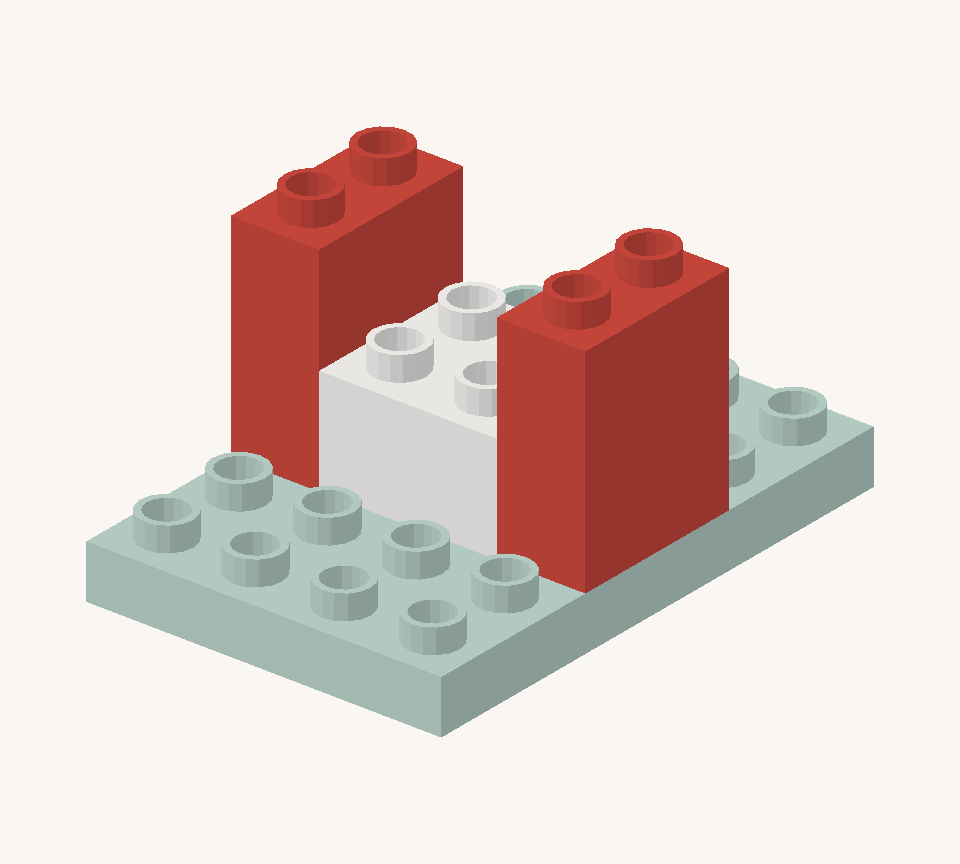
Add a red wall brick along each side of the white brick for two tall fins.
04
STEP 4 OF 7
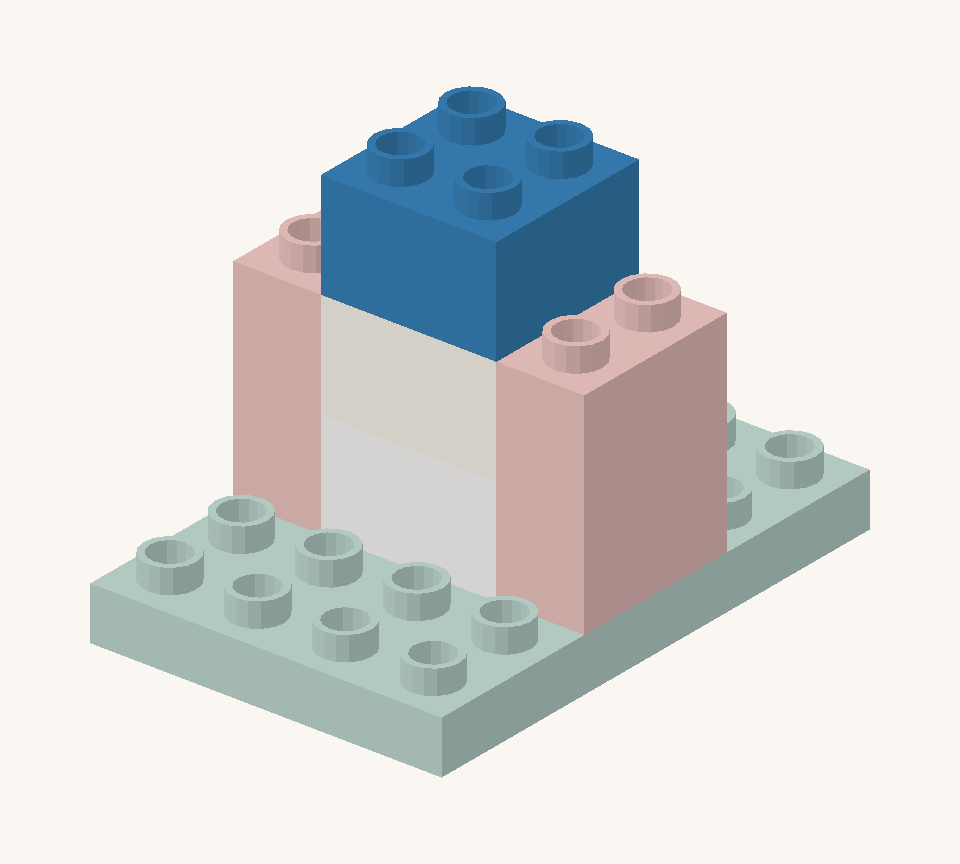
Stack another white square on the centre, then a blue square for a window band.
05
STEP 5 OF 7
Add two more white squares to the centre column, one above the other.
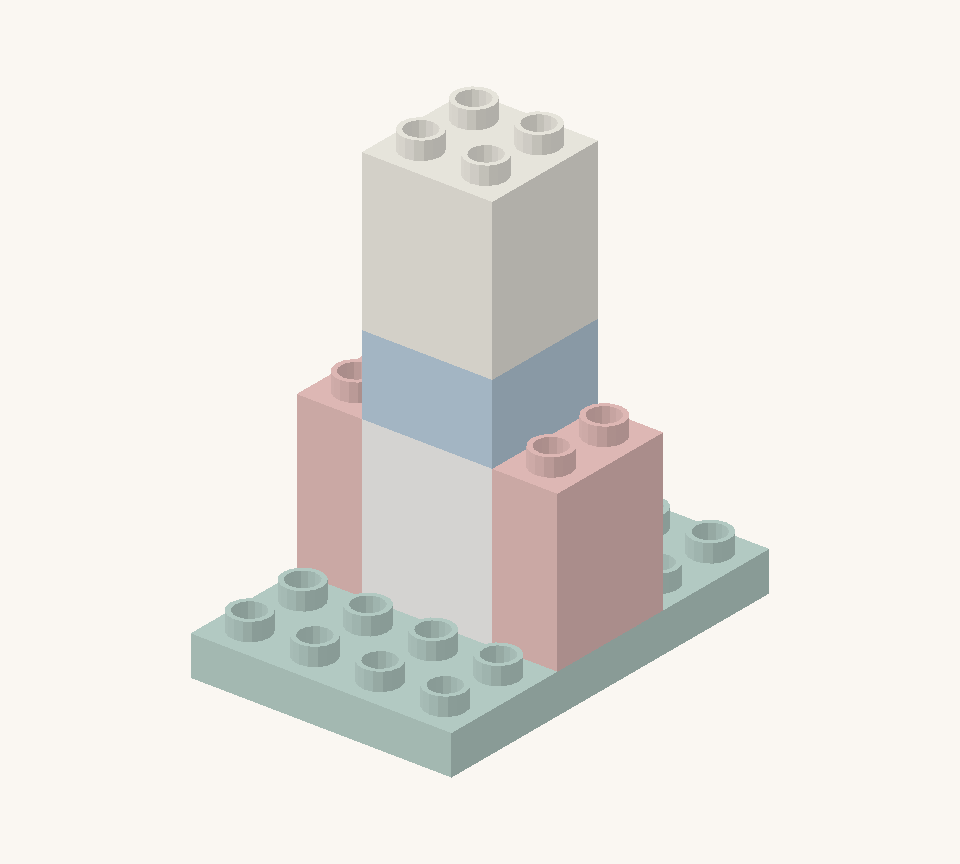
06
STEP 6 OF 7
Add a red square for a stripe, then a white square above it.
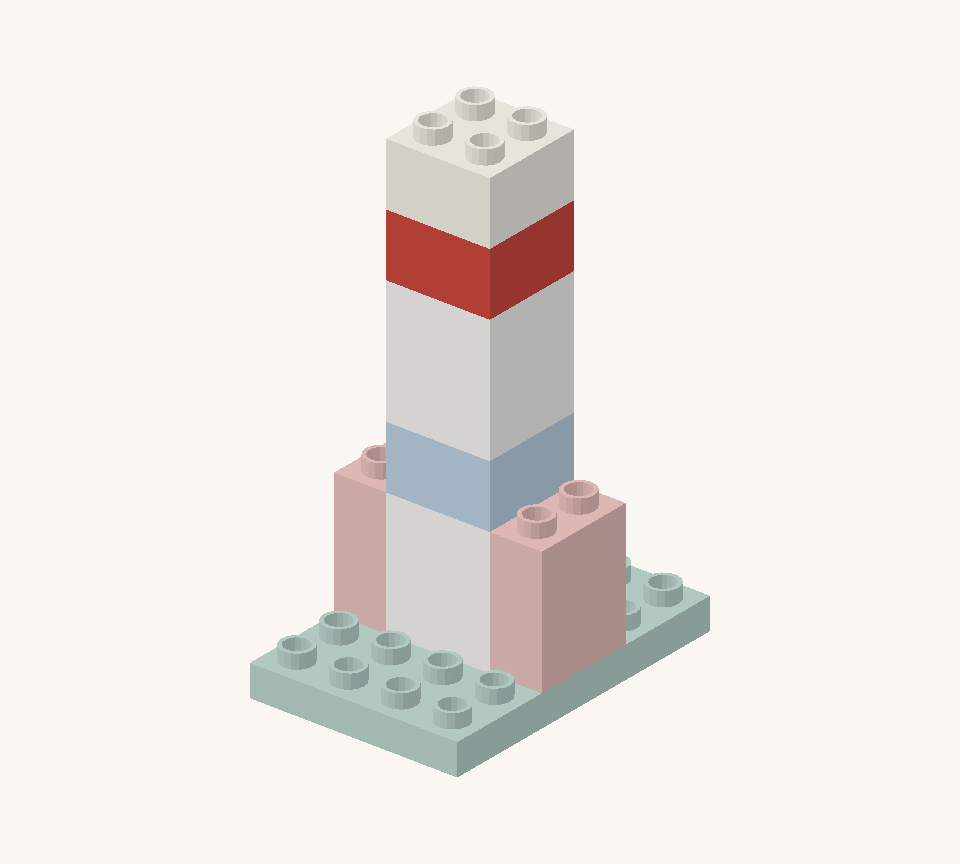
07
STEP 7 OF 7
Finish with the red cone as the pointed nose. Leave its small top stud free.
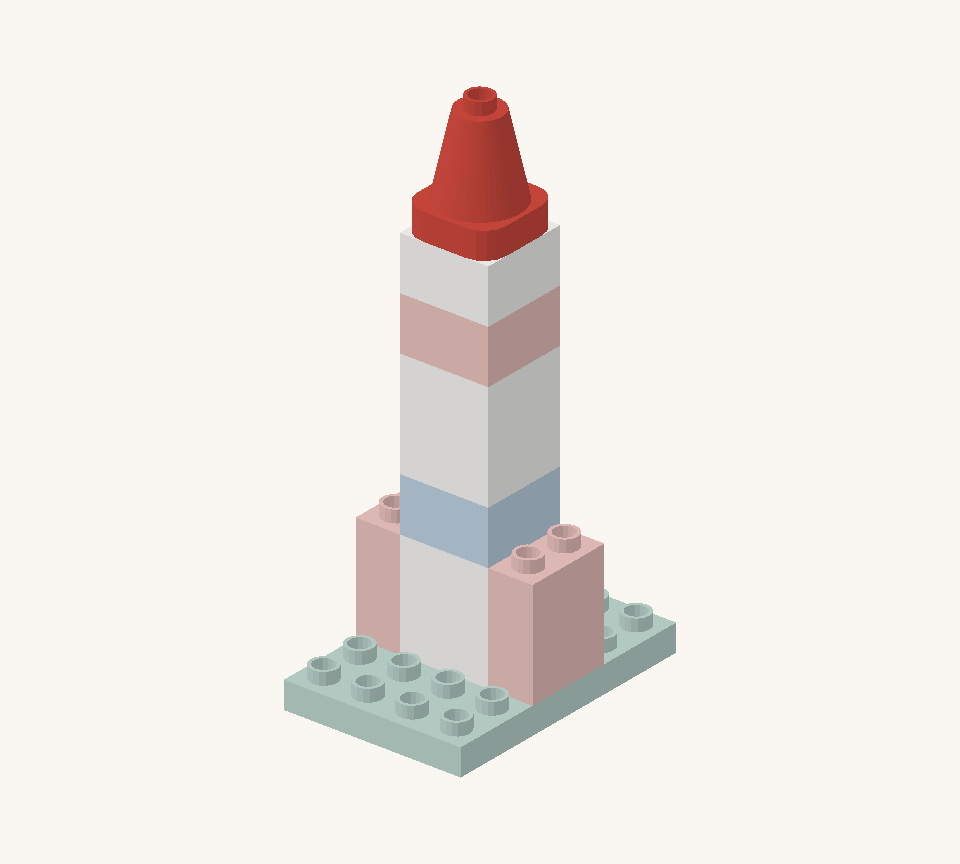
THE LAST STEP OF THE GUIDE
Room for a little more imagination.
Invent a planet and describe what you can see from your rocket.
Tell us how your build went
KEEP THE IMAGINATION GOING


