LET’S BUILD TOGETHER

Patchwork snail

18 pieces 9 steps · One little step at a time.

Print all steps ↗
See all the pieces

A LITTLE PREPARATION

Gather your pieces

Use whichever colours you have. Check the shapes before you start.

18pieces in total

See the original colours

Your checklist stays on this device when browser storage is available.

01

STEP 1 OF 9

Place the green base plate lengthways on the table for a leafy path.
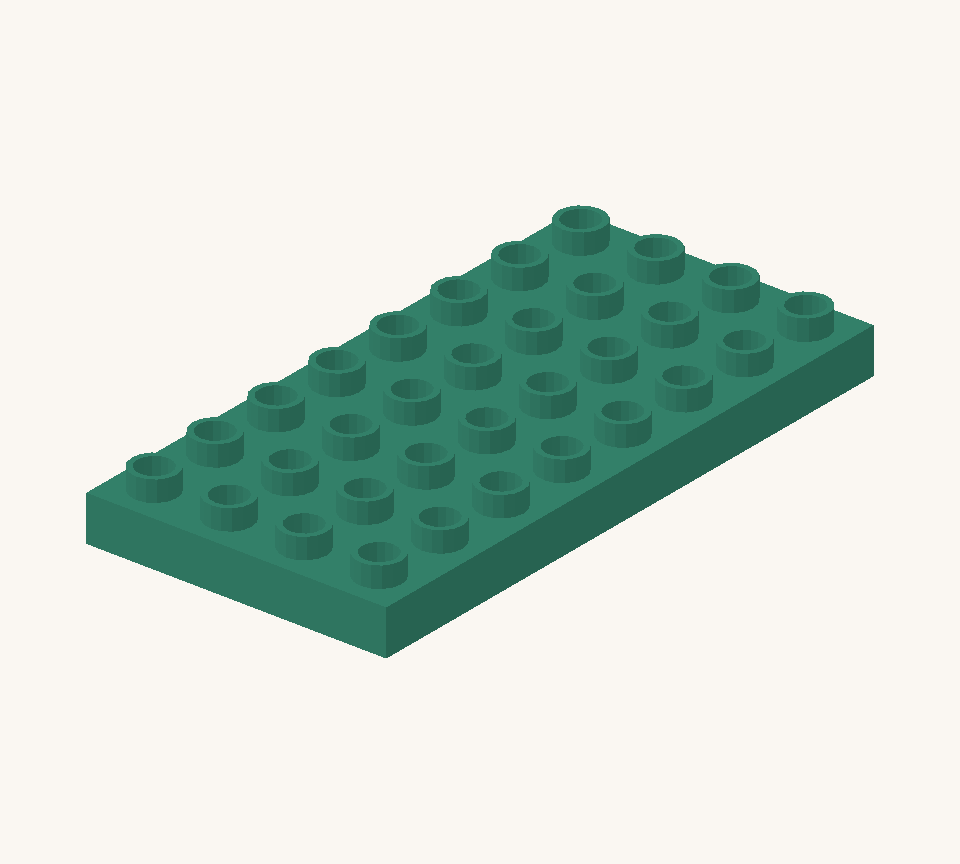
Place the green base plate lengthways on the table for a leafy path. New additions are shown in their original colours; earlier pieces are lighter.
02

STEP 2 OF 9

Lay a yellow long brick along the centre, two rows from the back. Add yellow curves at both ends with their rounded ends pointing outward.
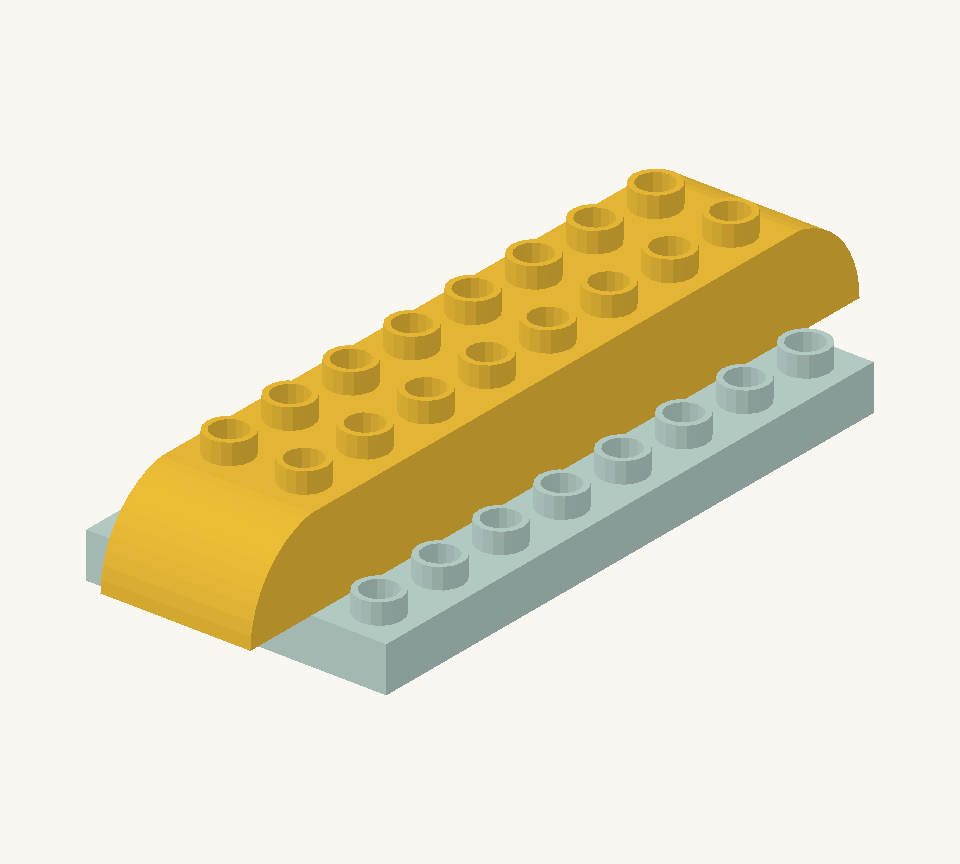
Lay a yellow long brick along the centre, two rows from the back. Add yellow curves at both ends with their rounded ends pointing outward. New additions are shown in their original colours; earlier pieces are lighter.
03

STEP 3 OF 9

Turn the purple small plate across the body, just behind its middle. Centre it so one stud column projects to each side.
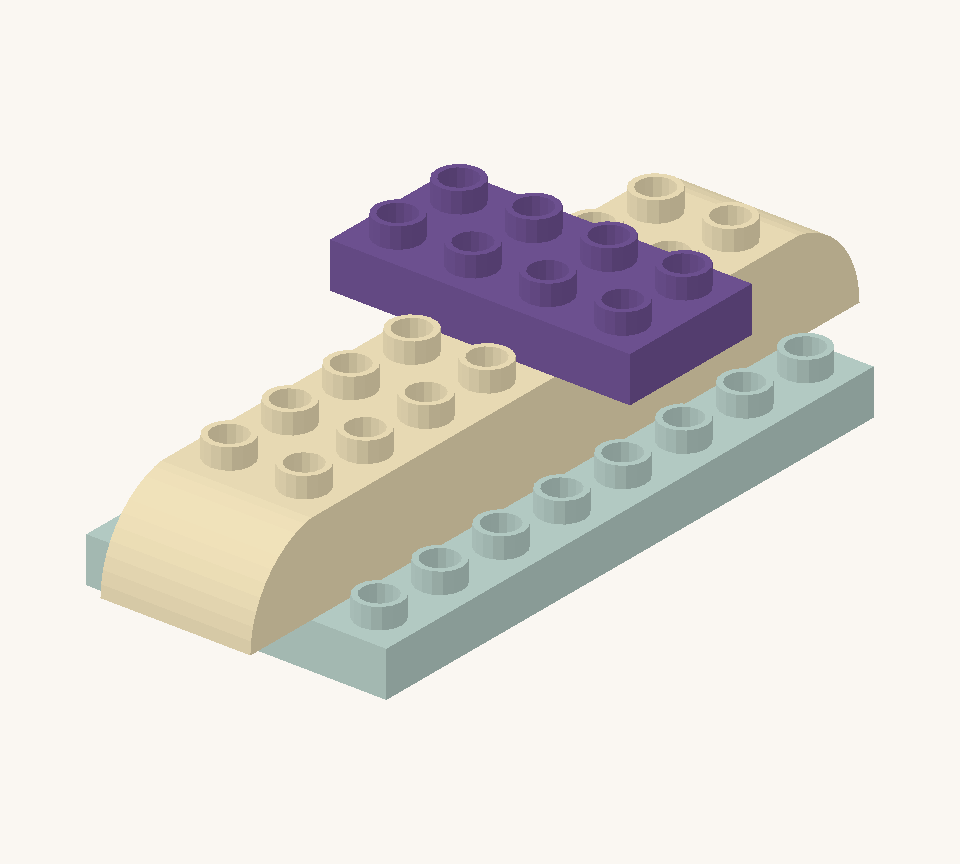
Turn the purple small plate across the body, just behind its middle. Centre it so one stud column projects to each side. New additions are shown in their original colours; earlier pieces are lighter.
04

STEP 4 OF 9

Start the shell with a purple long brick across that plate.
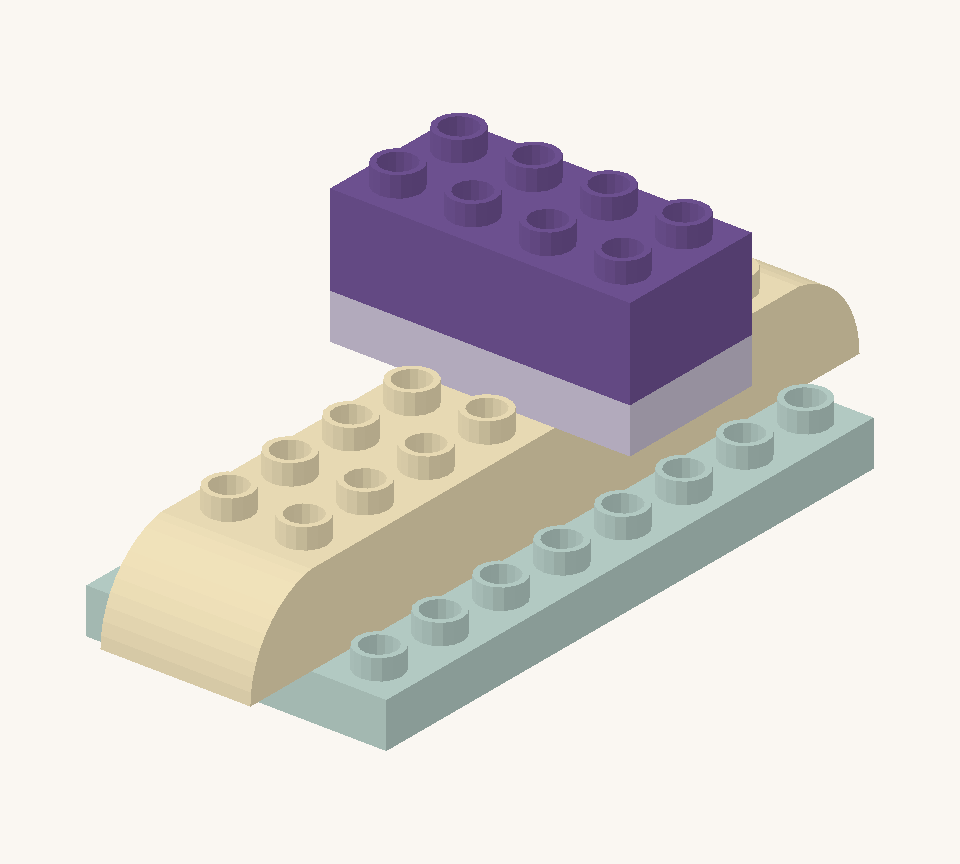
Start the shell with a purple long brick across that plate. New additions are shown in their original colours; earlier pieces are lighter.
05

STEP 5 OF 9

Widen the shell with three squares in a row: orange, cream, orange. The outside squares project one stud column beyond the layer below.
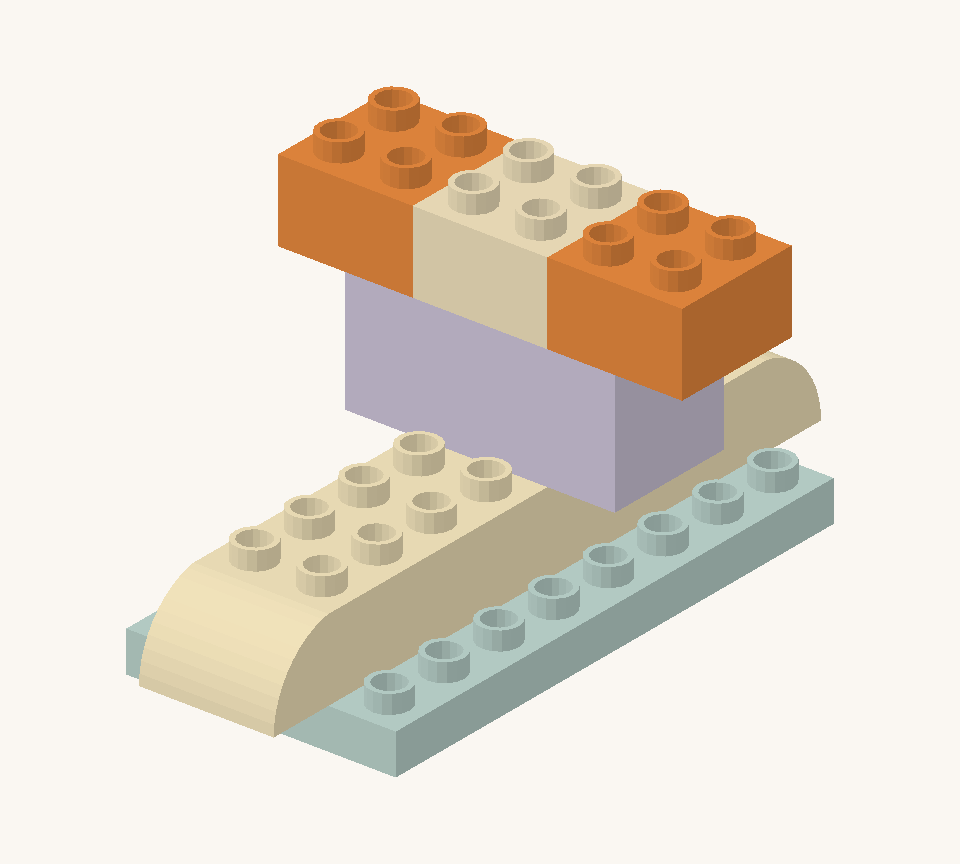
Widen the shell with three squares in a row: orange, cream, orange. The outside squares project one stud column beyond the layer below. New additions are shown in their original colours; earlier pieces are lighter.
06

STEP 6 OF 9

Repeat the three-square row, this time with a purple centre between the orange sides.
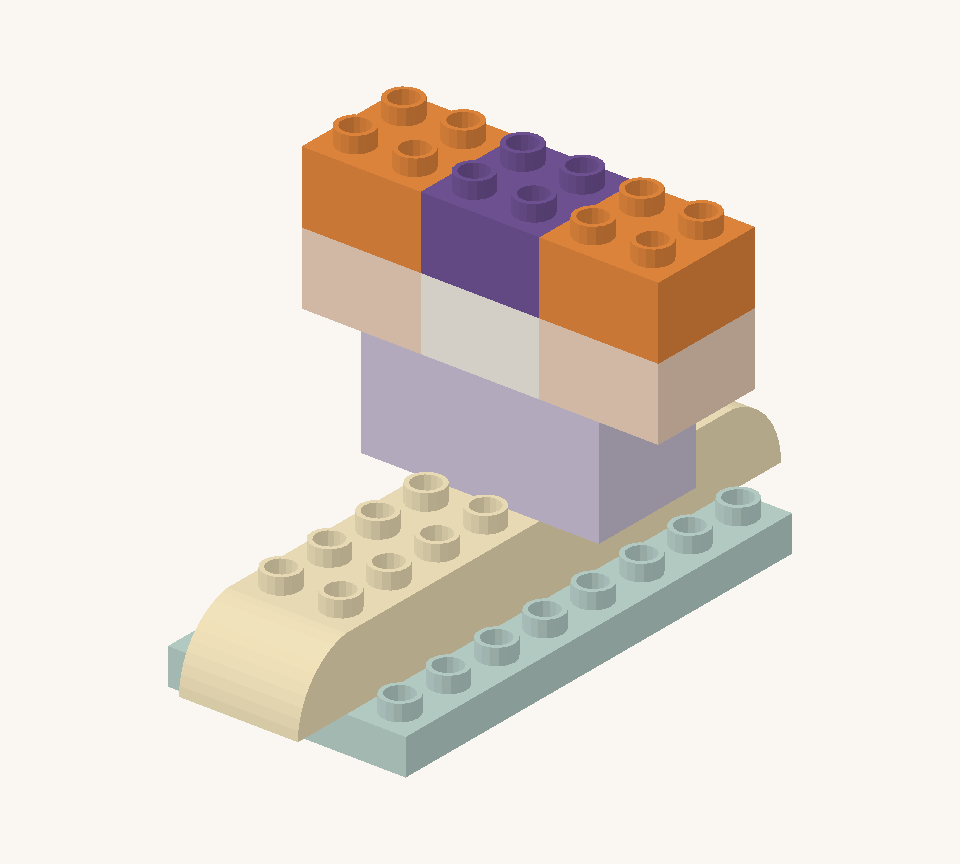
Repeat the three-square row, this time with a purple centre between the orange sides. New additions are shown in their original colours; earlier pieces are lighter.
07

STEP 7 OF 9

Narrow the shell with a purple long brick centred across the top. Finish it with a purple double-curved brick facing across the shell.
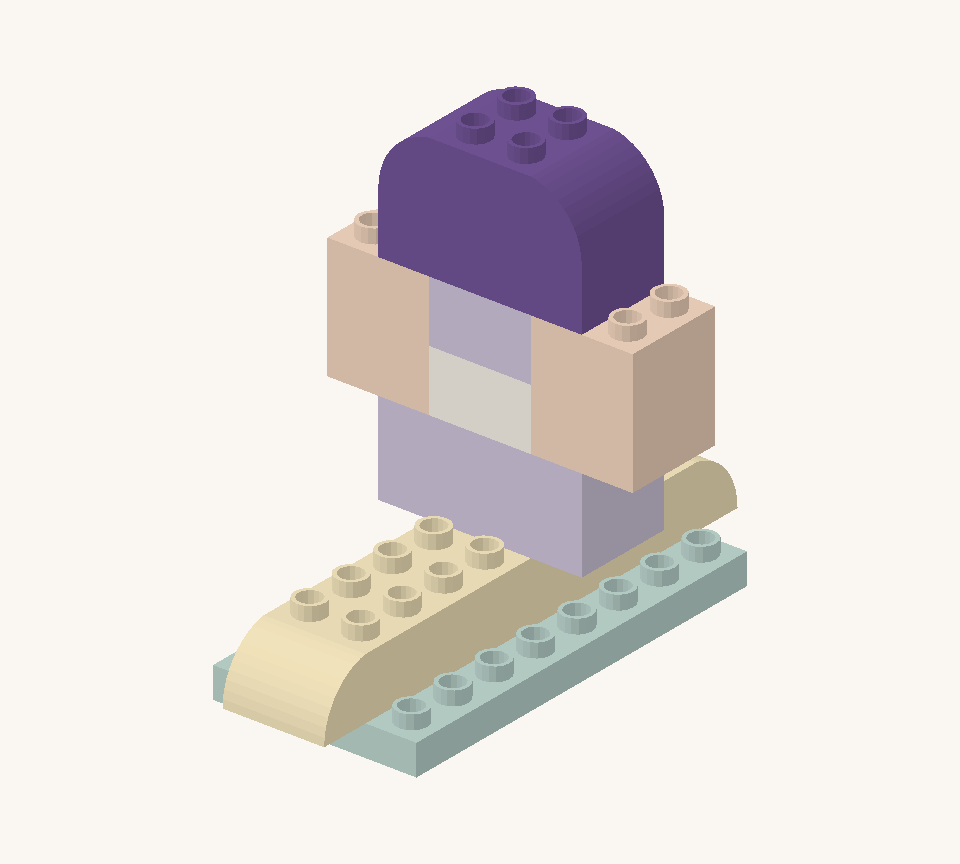
Narrow the shell with a purple long brick centred across the top. Finish it with a purple double-curved brick facing across the shell. New additions are shown in their original colours; earlier pieces are lighter.
08

STEP 8 OF 9

Stand a yellow tall square on the flat rows of the front curve for the head. Turn a yellow small plate across it, centred left to right.
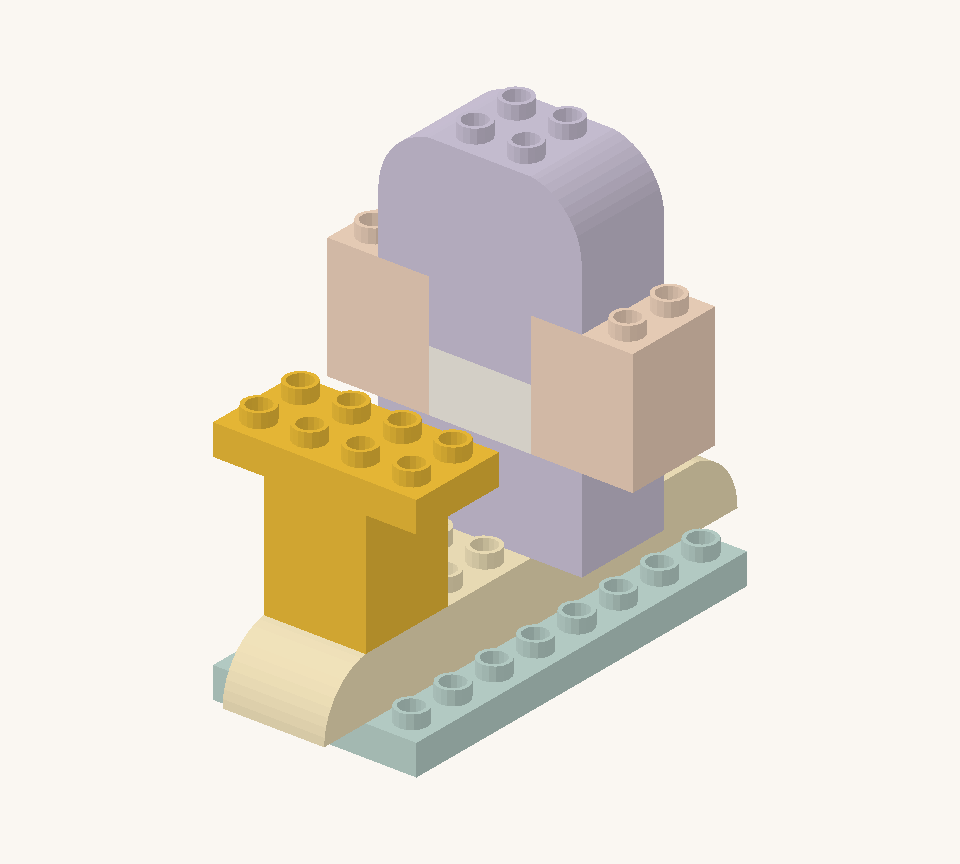
Stand a yellow tall square on the flat rows of the front curve for the head. Turn a yellow small plate across it, centred left to right. New additions are shown in their original colours; earlier pieces are lighter.
09

STEP 9 OF 9

Put two orange cones side by side on the head plate as the snail’s pointed feelers. Leave their top studs free.
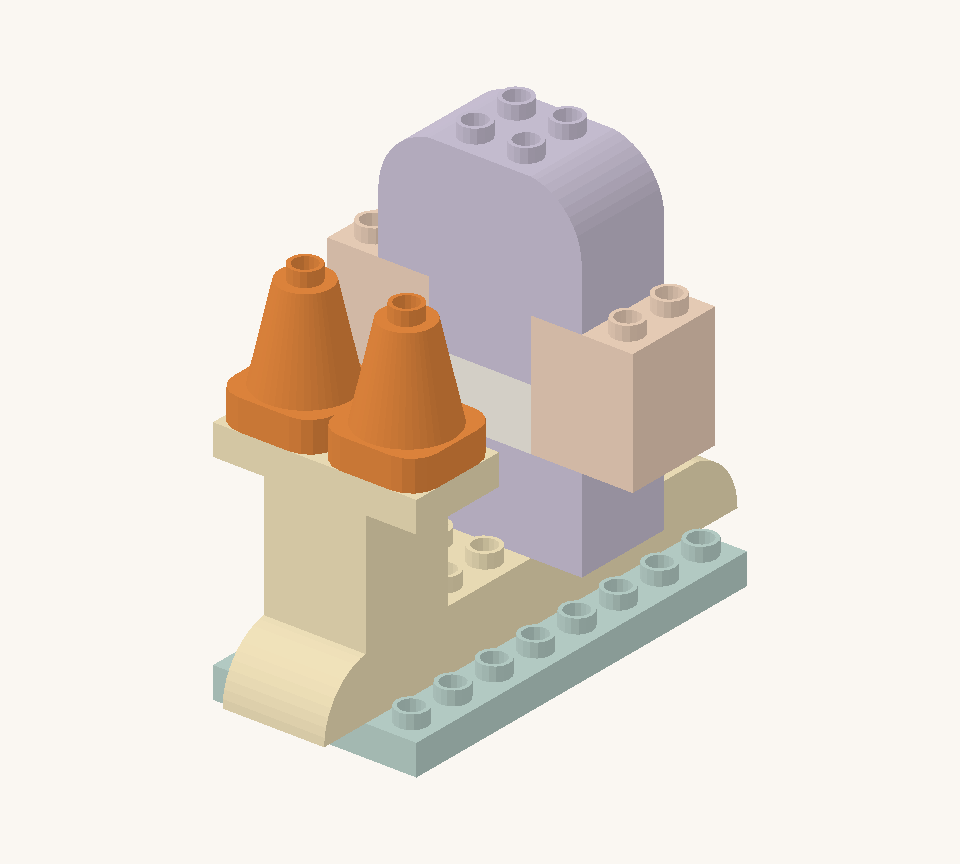
Put two orange cones side by side on the head plate as the snail’s pointed feelers. Leave their top studs free. New additions are shown in their original colours; earlier pieces are lighter.

THE LAST STEP OF THE GUIDE

Room for a little more imagination.

Give your snail a leaf-shaped paper trail to explore.

Tell us how your build went
Back to the build

Part and software credits.